

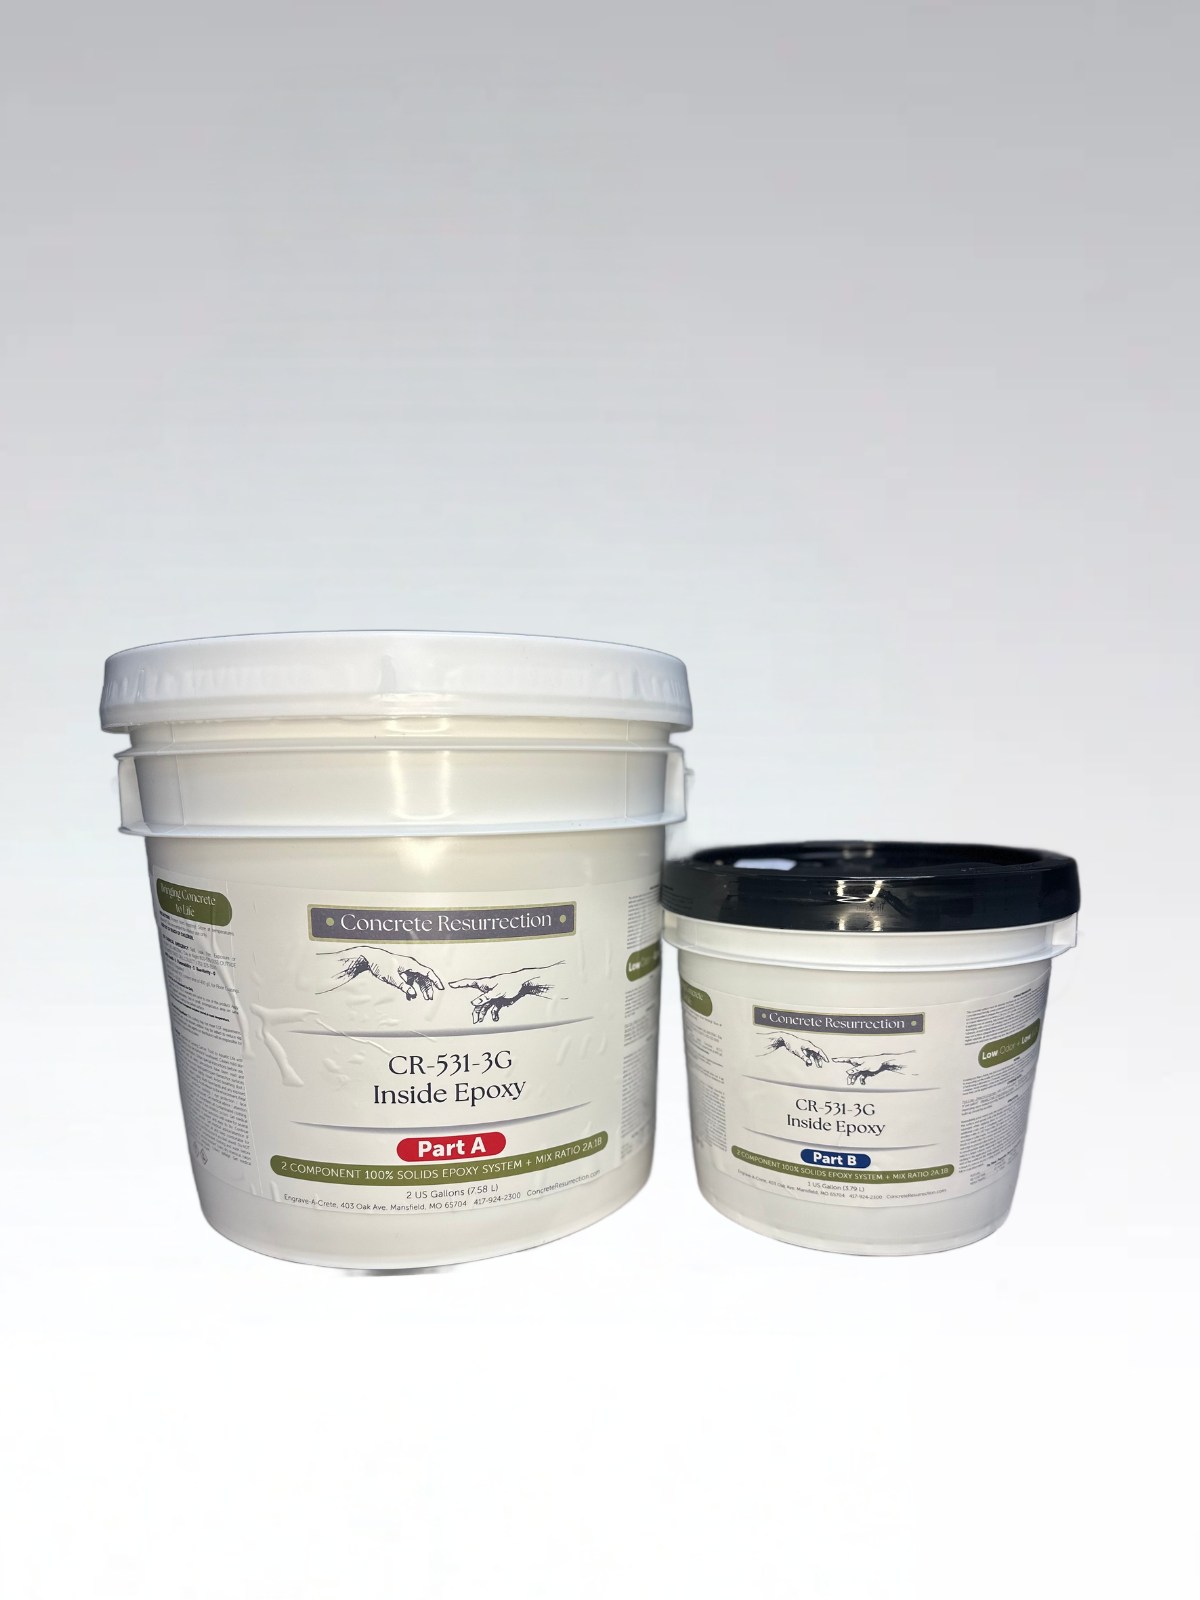
Epoxy - Interior Floor Coating
Transform your interiors with CR-531 Inside Epoxy, a premium two-component, 100% solids resin system. Engineered for versatility, this exceptional interior floor coating adapts to your needs with low, medium, or high build options. Known for its superior strength and flexibility, Inside Epoxy boasts impressive chemical resistance and clarity, making it an ideal choice for various environments.
Inside Epoxy is perfect for areas with minimal UV exposure, including food processing facilities, commercial kitchens, and wineries, where durability and hygiene are paramount. The high-gloss finish not only enhances the aesthetic appeal of any space but also contributes to ease of cleaning and maintenance. Whether you're looking to rejuvenate an industrial workspace or create a sleek residential look, this product stands ready to deliver exceptional results.
Versatility is at the core of Inside Epoxy's design. Not only can it be applied as a standalone coating, but it also adapts beautifully for specialized applications such as metallic epoxy floors and epoxy chip or flake floors. With the option to add pigment, you can achieve a solid color or develop stunning metallic effects that reflect your unique style.
Elevate your spaces with CR-531 Inside Epoxy, where functionality meets aesthetics for lasting beauty and durability. Perfect for commercial, industrial, and residential floors, this product is your go-to solution for high-performance interior flooring. Achieve stunning, resilient surfaces that will stand the test of time.
¾ Gallon Kit: 100-200 sq ft for Clear Coat
50-75 sq ft for Metallic Coating
3 Gallon Kit: 400-800 sq ft for Clear Coat
200-300 sq ft for Metallic Coating
(varies based on concrete surface porosity and amount of material applied)
A fine to medium shot blasting or the use of a diamond grinding machine to obtain a surface profile of a CSP - 3 to a CSP - 5 is suggested for ultimate adhesion.
A test should be made to determine that the concrete is dry; this can be done by placing a 4 x 4 plastic sheet on the substrate and taping down the edges. If after 24 hours, the substrate is still dry below the plastic sheet, then the substrate should be ready to coat. More advanced moisture testing kits should be used on floors with suspected moisture problems.
Apply coating to a clean surface that is completely dry and free of oil, dirt, grime, wax, detergent or any incompatible paint or coating.
CONCRETE RESURRECTION CR-531 Inside Epoxy can be applied at a rate of 3 to 8 mils thick, using a roller, squeegee or trowel within the usable pot life time frame. While applying keep a wet edge to prevent streaking. It is recommended to work in sections usually using control joints as dividers to ensure proper application results. Do not allow to Puddle!
Additional coats: Previously coated surfaces must be mechanically cleaned and abraded using a floor machine (buffer) with 80 mesh sanding screen prior to application to ensure adequate inner coat adhesion.
Please Note: Applying CR-531 Inside Acrylic outside of the suggested parameters may result in job failure. It is always recommended to test the product in a small, inconspicuous area (on the same concrete substrate) for desired results prior to application. Coverage rates may vary for all coatings and substrates depending on porosity, density, texture etc.
For Detailed Application Instructions refer to complete Technical Data that Comes with the product.
When an “Epoxy Chip” floor is desired there are multiple methods to apply product.
Some of the design factors to consider before application is color of pigment in the epoxy and chip color.
Technique 1: (1-2 person team)
Roll or squeegee the epoxy across the width of the job and approximately 5’ deep. Then broadcast the epoxy chips onto the wet epoxy approximately 4’deep. This will allow you to roll the next section of epoxy into the first area without picking up chips on your roller cover. Continue to repeat this process until complete coverage is obtained
Technique 2: (3-5 person team)
Coat the entire surface to be treated with the desired color of epoxy. Wearing epoxy spikes or golf spikes, walk carefully onto the floor and broadcast the entire surface with epoxy chips.
Final Coat:
After the epoxy has become tack free (typically 6-10 hours) a coat of clear Inside Epoxy should be applied to the top surface in order to protect the epoxy chips. If additional protection is desired, a top coat of Inside Urethane may be applied over the Inside Epoxy (allow 12 hours of cure time and mechanically abrade the Inside Epoxy prior to the Inside Urethane application).
Tips
Spikes:
Wearing spikes (epoxy spikes or golf shoes) will allow you to walk out over the epoxy to broadcast chips or fix any issues. ***WARNING*** Walking on wet epoxy with spikes is like walking on ice. Move slowly and carefully.
Broadcasting Chips:
Prior to your first job practice broadcasting chips onto “dry” concrete to test your technique. It is best to throw a small handful of chips up into the air and let them scatter as they fall down. This technique helps to avoid “clumps” of chips on the floor.
Mixing Instructions
When mixing epoxy pigments, add the appropriate amount of pigment into the resin (part “A”) and mix completely using a paint mixer on a low speed drill. When desired color is achieved, follow the directions above for adding and mixing in the hardener (part ”B”). It is critical to have an exactly portioned mixture, which has been prepackaged for you to eliminate any guesswork or measuring.
After combining the two components, use a paint mixer on a low speed drill for 2 minutes to completely mix the components. Be careful to not whip air into the mixture, and be certain to scrape the sides and bottom of the can to combine all molecules. Incomplete mixing or an off balance mixture will result in a coating that will remain soft.
Application Recommendations
The epoxy can be applied at a rate of 3 to 8 mils thick, using a roller, squeegee or trowel within the usable pot life time frame, as well as the recommended temperature and relative humidity guidelines listed in the Technical Information section.
While applying keep a wet edge to prevent streaking. It is recommended to work in sections usually using control joints as dividers to ensure proper application results. Do not allow to Puddle!
For a thicker build and bolder color pour contents out in a long trail for application. Spread with Notched squeegee or gauge (wider squeegee is recommended), Spread product evenly over area. Flatten the poured out trail into place, as it self-levels. Back roll with a 3/8” roller or mohair roller or smooth using a speed squeegee or loop roller. (rollers should be premium quality with phenolic core and 18” wide is recommended for larger areas)
MIXING
Base Coat: When mixing a base coat or Liquid Nebula Metallic pigments epoxy add the appropriate amount ofpigment into the resin (part “A”) and mix completely using a paint mixer on a low speed drill. When desired color is achieved follow the directions above for adding and mixing in the hardener (part ”B”). It is critical to have an exactly portioned mixture, which has been prepackaged for you to eliminate any guesswork or measuring. After combining the two components use a paint mixer on a low speed drill for 2 minutes to completely mix the components. Be careful to not whip air into the mixture, and be certain to scrape the sides and bottom of the can to combine all molecules. Incomplete mixing or an off balance mixture will result in a coating that will remain soft.
Liquid Nebula Metallic Coat: When possible, blend the Liquid Nebula Metallic pigment into the part A component of CR-531 Inside Epoxy 24 hours prior to job start. This soaking time will allow the full wetting of the pigments with the Part A resin, thus minimizing the appearance of clumped pigment and “comet tail” effects during epoxy movement. If unable to do that, when mixing the Liquid Nebula Metallic pigments shake the container of Liquid Nebula Metallic Pigment and empty the entire container into the resin (part “A”) 3 gallon kit of Concrete Resurrection Inside Epoxy. Be sure to get all of the pigment into the liquid and not onto the sides of the container. Once mixed completely add the hardener (part “B”). It is critical to have an exactly portioned mixture, which has been prepackaged for you to eliminate any guesswork or measuring.
Multiple colors can be applied for additional effects – be sure to not overwork or you will not see the two distinct colors.
***WARNING*** Use only Concrete Resurrection epoxy pigments.
Application Recommendations
BASE COAT: The base coat for Liquid Nebula can be applied at a rate of 3 to 8 mils thick, using a roller, squeegee or trowel within the usable pot life time frame, as well as the recommended temperature and relative humidity guidelines listed in the Technical Information section.
LIQUID NEBULA METALLIC: Spiked shoes are recommended throughout application. Pour contents out in a long trail for application. Liquid Nebula Metallic Epoxy can be spread with Notched squeegee or gauge (wider squeegee is recommended), Spread product evenly over area. Flatten the poured out trail into place, as it self-levels. Back roll with a 3/8” roller or mohair roller or smooth using a Magic Trowel, speed squeegee or loop roller. (rollers should be premium quality with phenolic core and 18” wide is recommended for larger areas)
Choose options