
Mastering Decorative Concrete: A Step-by-Step Guide to Using Engrave-A-Crete's KaleidoCrete System
Most decorative concrete projects stall when it's time to add real detail. You might have the vision, but the tools and process can feel overwhelming. Engrave-A-Crete's KaleidoCrete System changes that by combining concrete templates with the Barracuda engraving tool for large areas and the Wasp for fine details. This guide walks you through everything from picking your design to ordering, proofing, shipping, and installing KaleidoCrete so your project runs smoothly from start to finish.
Understanding the KaleidoCrete System
The Components
The KaleidoCrete System by Engrave-A-Crete is a complete solution for creating beautiful decorative concrete. It combines specially designed templates with two main engraving tools:
-
The Barracuda - Perfect for larger areas and creating the main design elements
-
The Wasp - Ideal for fine details, touch-ups, and getting into tight spaces
This combination gives you both speed and precision, making professional-quality concrete engraving possible for contractors and ambitious DIYers alike.
Design Options
When working with the KaleidoCrete System, you have two main paths:
-
Standard Designs - Choose from Engrave-A-Crete's library of proven patterns
-
Custom Designs - Create something unique for your specific project needs
All templates are cut based to your size specifications at time of order. There is no difference in price for standard or custom designs, although template "kits" are available at a discounted price for popular borders, flagstone, medallions.
The KaleidoCrete Process
Step 1: Design Selection and Ordering
Start by browsing through the available patterns or submit your custom design idea. When ordering:
-
Provide artwork if custom and the size you would like your template.
-
A final quote will be given to confirm price.
-
Once price is approved a proof will be created.
-
If you are unsure of what size you need, you can provide the size of the space it will go in and we can mock up some ideas.
For custom designs, the Engrave-A-Crete team will work with you to turn your vision into a workable template.
Templates Don’t Have to Be Fancy — Everyday Designs Are Some of the Most Popular
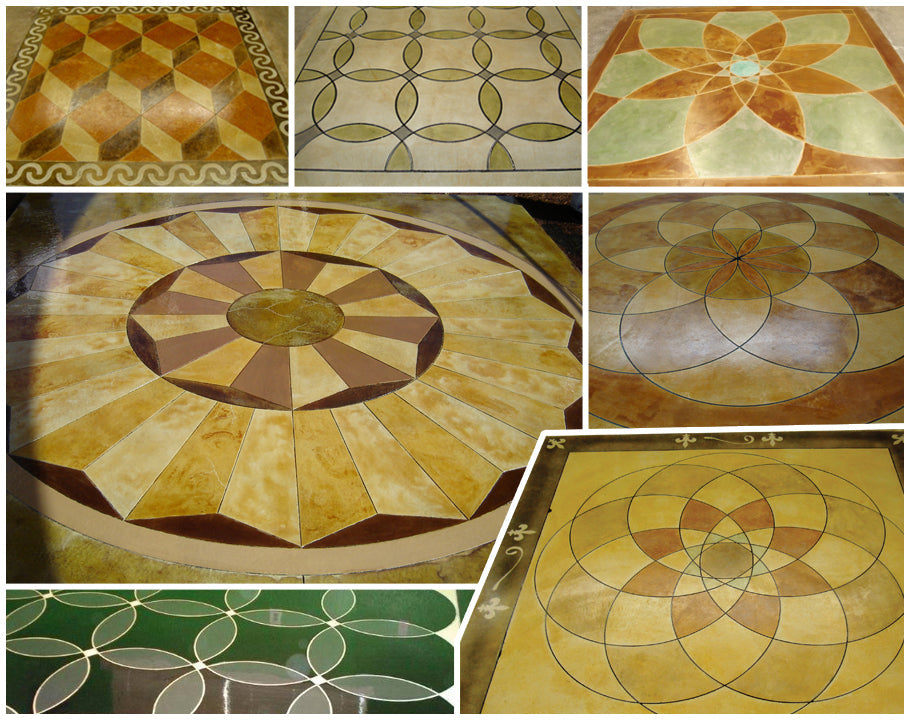
When people think of concrete templates, they often picture big, elaborate designs—logos, medallions, mascots, or intricate artwork. And while those are absolutely possible (and fun), they’re only one small part of what templates can do.
Some of the most popular and most useful templates are actually simple, everyday patterns that make concrete look beautifully finished without feeling over‑the‑top.
Everyday Templates That Customers Love
You don’t need a giant centerpiece design to make concrete stand out. These practical, go‑to templates are used constantly by both DIYers and professional installers:
-
Flagstone patterns
Perfect for patios, walkways, and pool decks—natural, organic, and always in style. -
Cobblestone grout lines
A quick way to create the look of hand‑laid stone without the labor or cost. -
Address numbers
Clean, crisp, and incredibly useful for driveways, curbs, and entryways. -
Tile layouts
Simple grid patterns that instantly elevate interior floors or outdoor living spaces. -
Ashlar slate
A timeless, structured pattern that works in almost any setting. -
Letters and basic typography
Great for labeling, wayfinding, monograms, or adding a personal touch.
Why These “Simple” Templates Matter
These designs may not be flashy, but they’re the backbone of decorative concrete. They’re versatile, easy to integrate into any project, and they deliver a polished, professional look every time.
Whether you’re creating a natural stone effect, adding functional markings, or giving a space subtle structure, everyday templates are often the smartest—and most requested—choice.
Step 2: Design Proofing
Before production begins:
-
You'll receive digital proofs of your concrete templates
-
Review them carefully for accuracy
-
Request any adjustments needed
-
Approve the final design
This step is crucial for custom work - take your time to make sure everything looks right before moving forward.
Step 3: Shipping and Preparation
Once approved, your KaleidoCrete templates will be produced and shipped. While waiting:
-
Clean the concrete surface thoroughly.
-
Complete staining if you are making it all the same color.
-
Make any needed repairs
-
Gather your tools and supplies
-
Watch Engrave-A-Crete tutorial videos to familiarize yourself with the process
Step 4: Layout and Installation
When your templates arrive:
-
Dry fit them on your surface to confirm placement
-
Set up your Barracuda engraving tool for the main work. Barracuda runs off of air - 5CFM @ 90PSI.
-
Follow inside the template lines with the tool just long enough to remove the stain.
Remember that the Barracuda works best for larger areas and straight lines. Take your time and work methodically.
How to Stain Inside Your Template Design Using Multiple Colors
When you’re working with a detailed template design—especially one that uses multiple stain colors—good layout and clean workflow make all the difference. Here’s a simple, reliable method to ensure crisp, professional results every time.
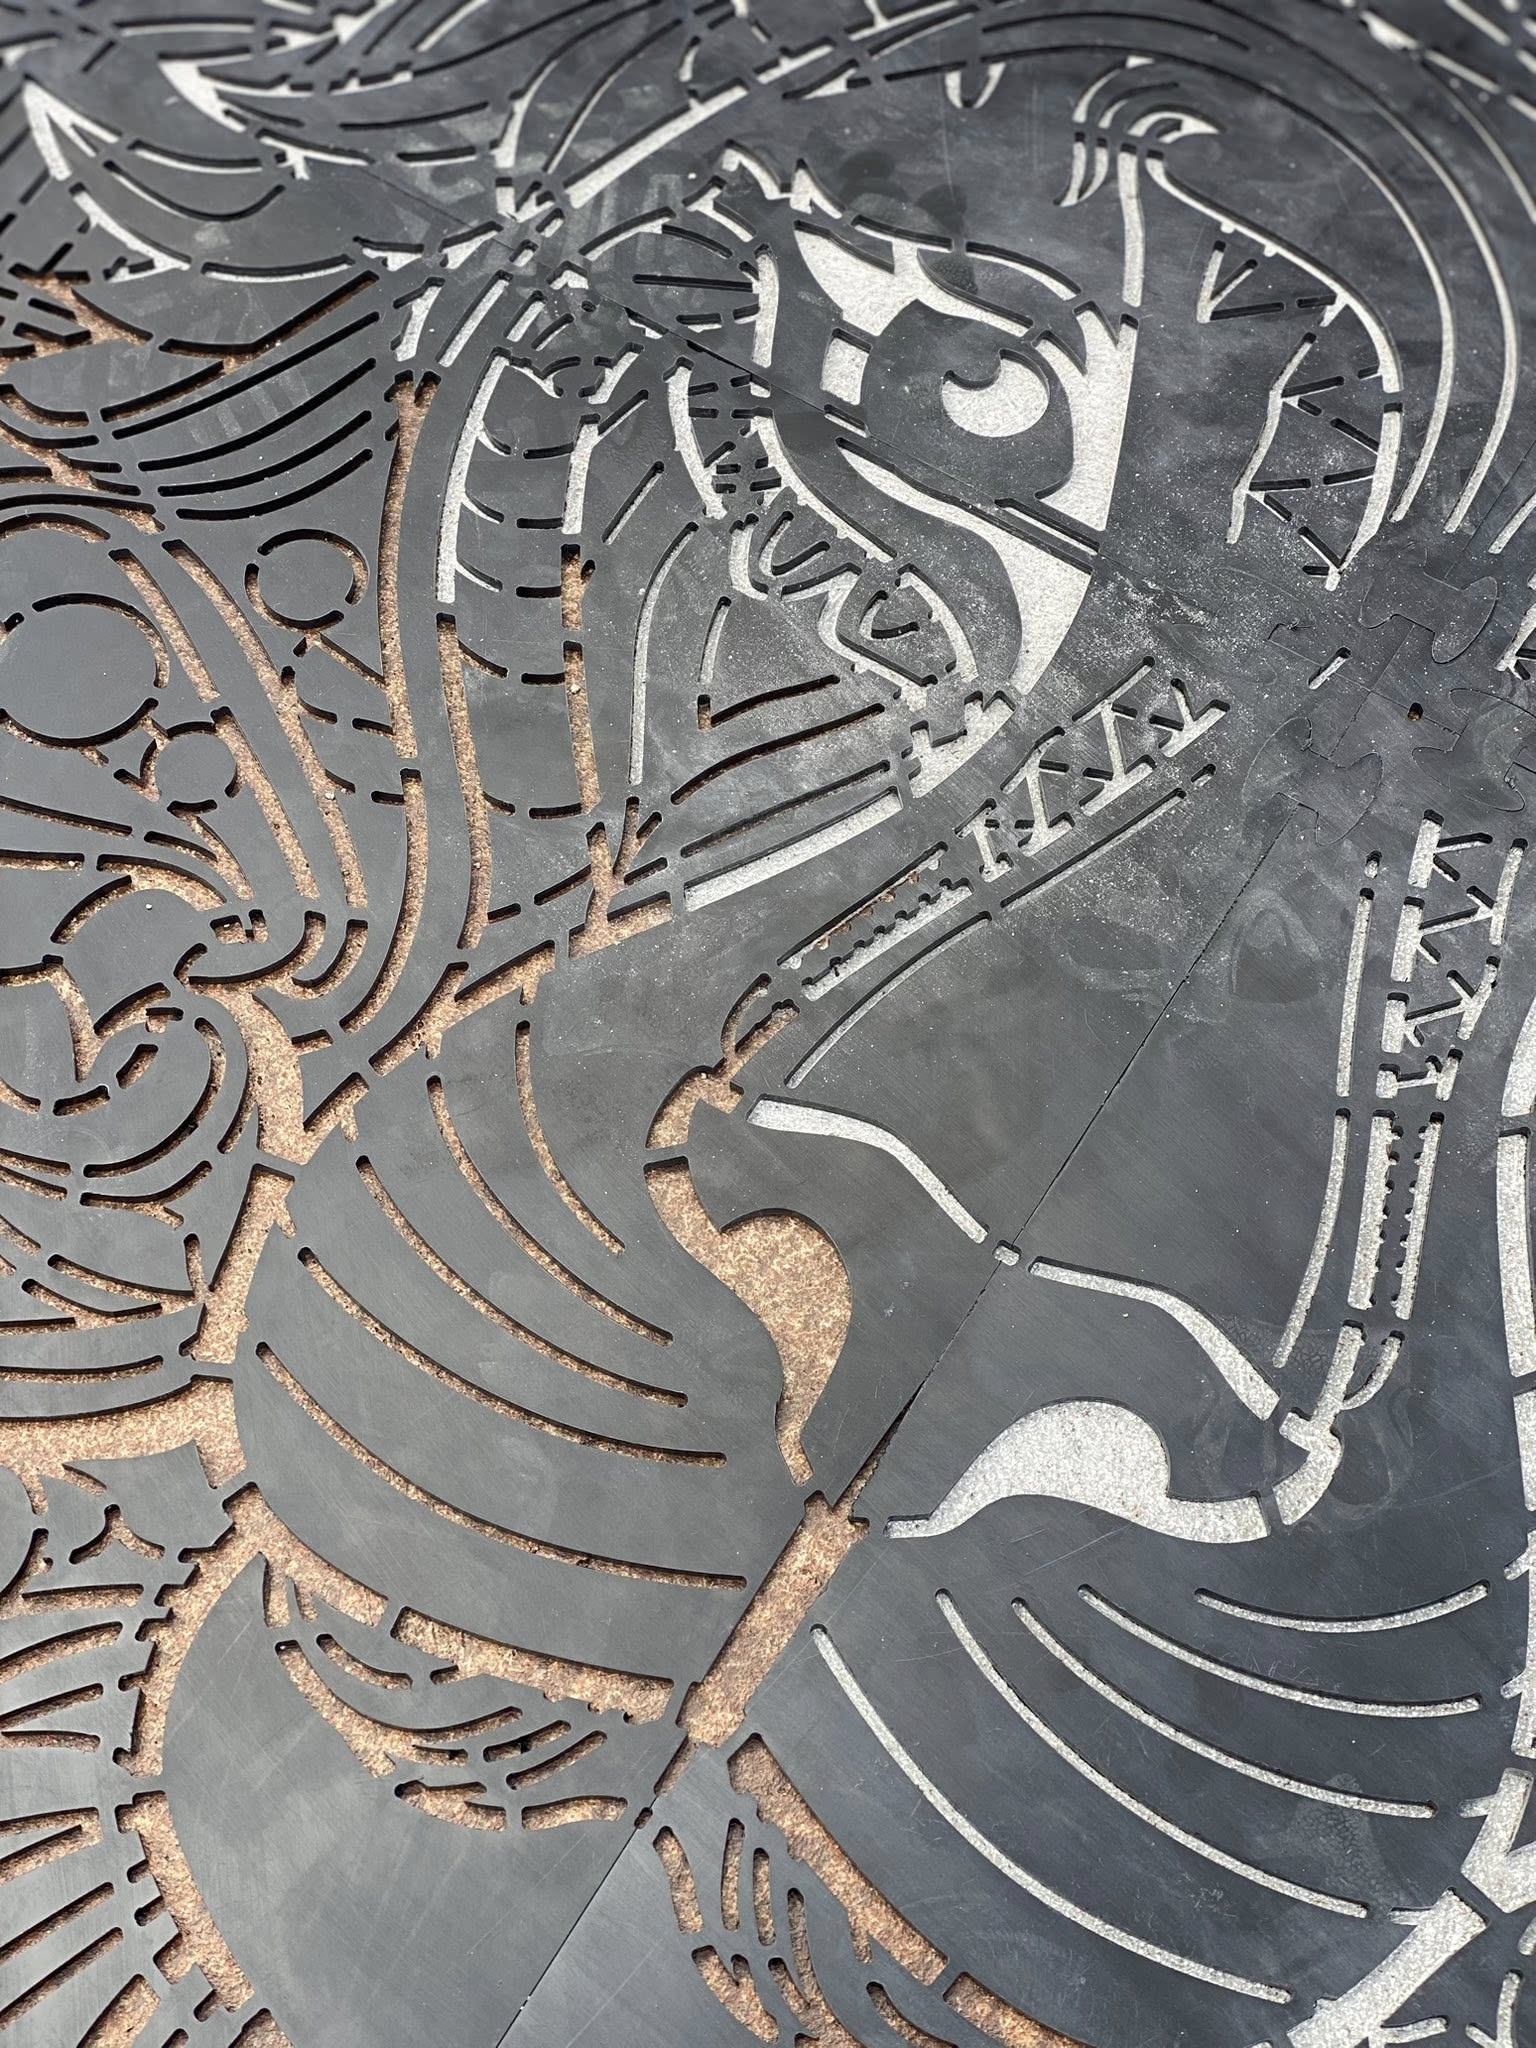
1. Position and Transfer Your Template Design
Place your template exactly where you want the design to appear on the concrete. Once it’s aligned, use a primer spray paint to lightly transfer the pattern onto the surface. This creates a clear guide you can follow during staining.
Pro tip:
Mark one spot on the template and a matching spot on the concrete in a contrasting color. This gives you an easy registration point so you can realign the template perfectly later.
2. Remove the Template and Apply Your Stains
Lift the template off the surface. Now you’ll work inside the primer lines, applying your stains color by color. Because the primer outlines remain visible, you can stain freely without worrying about losing your layout.
Take your time here—this is where your color work shines.
3. Re‑Layout the Template for Engraving
Once all staining is complete and dry, place the template back onto the concrete using your registration marks for perfect alignment.
4. Cut the Lines with the Barracuda and Wasp
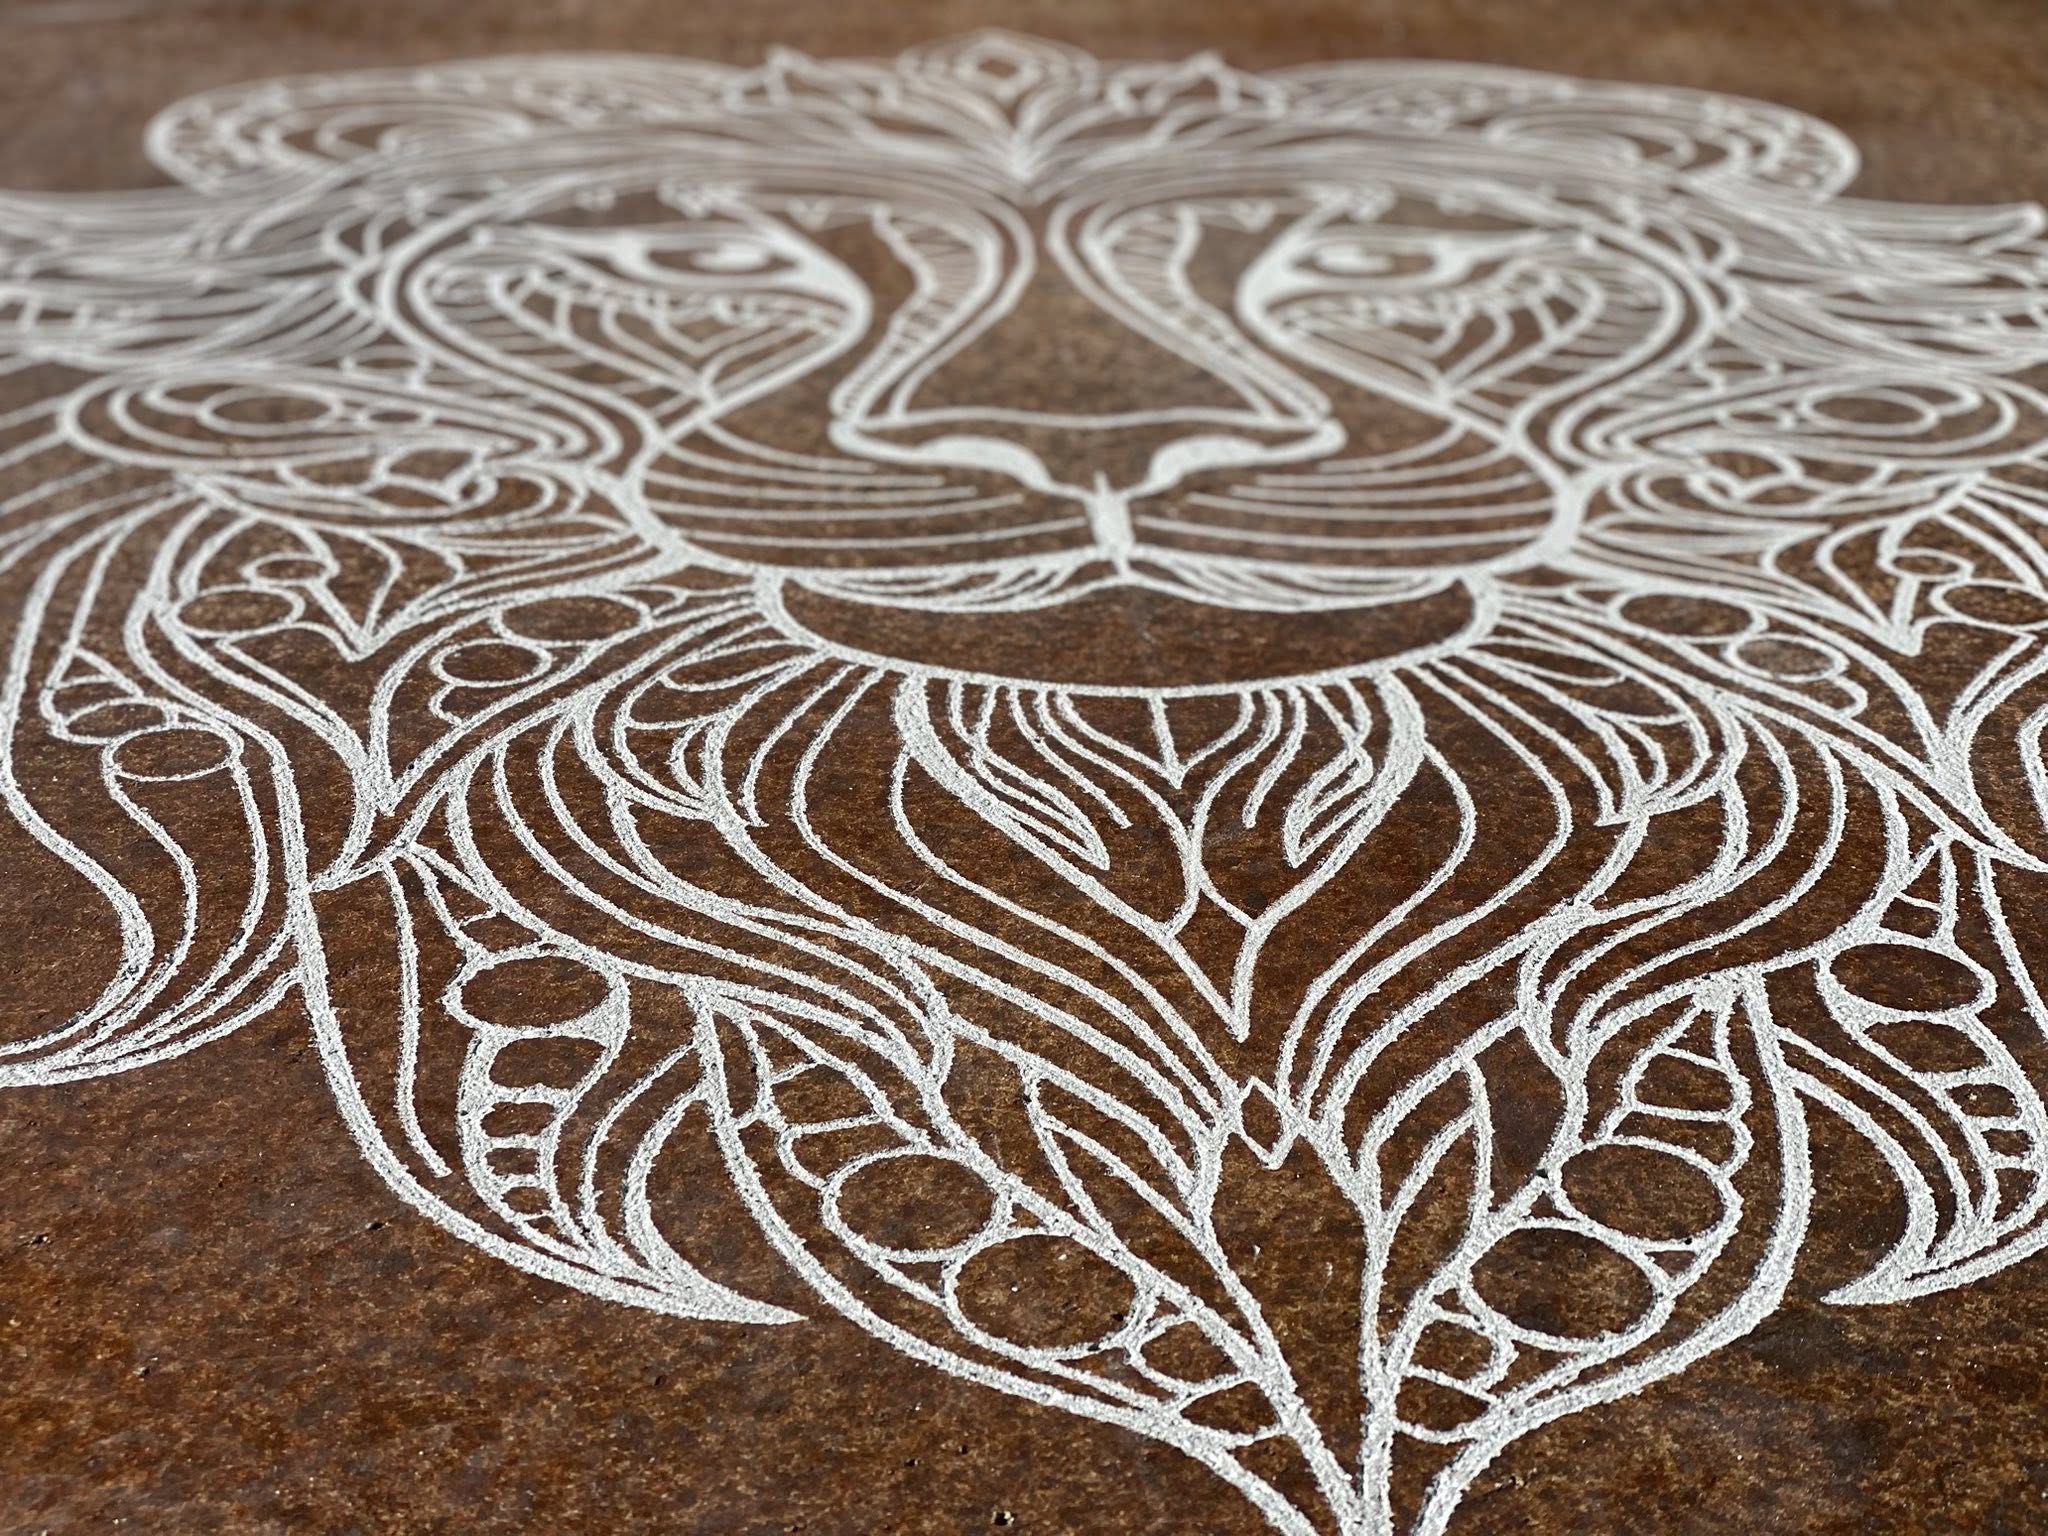
With the template in place, use the Barracuda and Wasp to cut along every primer spray paint line. The template keeps your cuts clean and consistent, ensuring the engraved lines frame your colors beautifully.
When you lift the template, you’ll see crisp, sharp outlines that make each color pop.
5. Remove Bridges and Final Clean‑Up
Use the Wasp to remove any bridges left in the design. This is also the time to do any touch‑up engraving or detail work needed to refine the final look.
Step 5: Detail Work with the Wasp
After the main engraving:
-
Switch to the Wasp engraving tool for finer details
-
Use it to clean up any areas the Barracuda couldn't reach
-
Make any touch ups needed.
The Wasp gives you much more control for intricate work, making it perfect for finishing touches.
Step 6: Finishing
Once the engraving is complete:
-
Remove all templates carefully
-
Using your wasp remove any necessary bridges (bridges are the small pieces of plastic that hold the template together)
-
Clean out dust and debris
-
Seal the surface for protection
The KaleidoCrete System makes professional decorative concrete work possible even for those new to concrete engraving. With the right preparation and attention to detail, you'll create stunning, long-lasting designs that transform ordinary concrete into works of art.
By following this guide and using the Engrave-A-Crete tools as directed, installing KaleidoCrete can be a smooth and rewarding process that results in truly custom concrete designs your clients or family will love for years to come.
Designing Your Concrete Masterpiece
The design phase sets the foundation for your entire project. Your concrete vision comes to life on paper first, ensuring the final product matches what you imagined and fits your space perfectly.
Ordering Your Concrete Templates
Ordering templates starts with accurate measurements. Take time to measure your concrete area twice, noting any obstacles like columns or drains. Include a small buffer zone (about 6 inches) around the edges to ensure complete coverage.
When submitting your order, include:
-
Dimensions
-
Art work
-
Any special requirements or obstacles
For custom work, expect a back-and-forth process. The design team will create digital mockups for your approval before production begins. This step might take an extra day but saves headaches later.
Plan for 1-2 weeks of lead time. Time will vary based on size, how detailed the art work is and the quality of the artwork. DXF or EPS files are the best - but we can work with most anything you have.
Tools for Precise Engraving
The right tools make all the difference between amateur and professional results. KaleidoCrete pairs perfectly with Engrave-A-Crete's specialized concrete engraving tools, each designed for specific parts of the job.
Using the Barracuda Engraving Tool
The Barracuda handles the heavy lifting in your concrete project. This workhorse tool cuts clean, consistent lines across large areas with minimal effort.
The trick to smooth operation is engraving just long enough to remove the stain. Once you see plain concrete you are good! The longer you hold the tool there, the deeper you will cut.
Keep your Barracuda clean throughout the job. Concrete dust builds up quickly and can affect cutting performance. A quick brush-off every 15-20 minutes maintains optimal results. You can watch detailed tutorials on proper Barracuda technique before starting your project.
Fine Details with the Wasp Engraving Tool
The Wasp engraving tool brings precision to your concrete work. While the Barracuda handles broader areas, the Wasp excels at tight corners, intricate patterns, and touch-up work that requires a delicate touch.
This handheld tool weighs just under two pounds, making it easy to control for extended periods. Its slim profile lets you reach into spaces the Barracuda can't access, perfect for detailed work, touch ups - even finishing up lines when saw cutting.
See the Wasp in action in this detailed demonstration video.
Many professional contractors have used KaleidoCrete to transform ordinary concrete into stunning decorative surfaces. Read about extreme concrete makeovers that showcase what's possible with these techniques.
The final result depends on your attention to detail during installation. Take your time, follow the process step by step, and you'll create a concrete surface that looks like it required much more time and money than it actually did.
